CHAPTER
|
Installing TEX and LATEX |
|
This course is based on using one of the following distributions of TEX on the 2004 TEX Collection DVD or the 2003 TEX Live CD:
- teTEX
for Linux and other Unix-like systems, including Mac OS X (Thomas Esser);
- proTEXt
for Microsoft Windows (Thomas Feuerstack), based on Christian Schenk's MikTEX;
- fpTEX
for Microsoft Windows (Fabrice Popineau) from the 2003 TEX Live CD.
Many other implementations of TEX, such as Tom Kiffe's CMacTEX for the Apple Macintosh, can be downloaded from CTAN. LATEX is included with all modern distributions of TEX.
The TEX Collection CD is issued annually on behalf of most of the local TEX user groups around the world (see http://www.tug.org/lugs.html for addresses), and edited by Sebastian Rahtz, Karl Berry, Manfred Lotz, and the authors of the software mentioned above. These people give an enormous amount of their personal time and energy to building and distributing these systems, and they deserve the thanks and support of the user community for all they do.
There are many other distributions of LATEX both free and commercial, as described in this Introduction: they all process LATEX identically, but there are some differences in size, speed, packaging, and (in the case of commercial distributions) price, support, and extra software provided.
One final thing before we start: publicly-maintained software like TEX is updated faster than commercial software, so always check to see if there is a more recent version of the installation. See the item ‘Use the latest versions’ in section 1.4.3 for more details.
 1.1 Editing and display
When you install LATEX you will have the opportunity to decide a) which plain-text editor[s] you want to use to create and maintain your documents; and b) which preview programs you want to use to see your typesetting. This isn't much use to you if you're unfamiliar with editors and previewers, so have a look at the table below, and maybe flip ahead to section 2.3 for a moment, where there are descriptions and screenshots.
The best bet is probably to install more than one — if you've got the disk space — or maybe all of them, because you can always delete the ones you don't like.
- Editors
There is a wide range of editors available: probably no other piece of software causes more flame-wars in Internet and other discussions than your choice of editor. It's a highly personal choice, so feel free to pick the one you like. My personal biases are probably revealed below, so feel equally free to ignore them.
- Previewers
For displaying your typesetting before printing, you will need a previewer. All systems come with a DVI previewer for standard LATEX, but if you are intending to produce industry-standard PostScript or PDF (Adobe Acrobat) files you will need a previewer for those formats. GSview displays both PostScript and PDF files; xpdf and Adobe's own Acrobat Reader just display PDF files.
For brief details of some of the most popular editors used for LATEX, see section 2.3.
Additional downloads
For licensing reasons, the GSview PostScript/PDF previewer, the Acrobat Reader PDF previewer, and the WinEdt editor could not be distributed on the 2003 CDs. In those cases you have to download and install them separately.
GSview is available for all platforms from http://www.ghostscript.com/gsview/index.htm (on Unix and VMS systems it's also available as GhostView and gv: see http://www.cs.wisc.edu/~ghost/)
Acrobat Reader (all platforms) can be downloaded from http://www.adobe.com/products/acrobat/readstep2.html
WinEdt (Microsoft Windows only) comes from http://www.winedt.com
1.2 Installation for Linux and Unix
Make sure your system libraries and utilities are up to date. If you are using Red Hat Linux, use yum or up2date to download and install updates. For Debian and other distributions, use apt-get or similar. On Red Hat systems, remove any RPM version of teTEX and associated utilities which may have been preinstalled, in order to avoid version conflicts.
If you are installing TEX Live to a new partition, and you have the opportunity to reformat the partition before use, use mkfs with a granularity as small as it will go (usually 1024 bytes). This avoids the partition running out of inodes because TEX uses very large numbers of very small files.
Plan the installation carefully if you are installing for multiple users (a shared machine): read section 5.2 for some comments on where to put additional files downloaded later, and see the FAQ on the same topic at http://www.tex.ac.uk/cgi-bin/texfaq2html?label=wherefiles
Above all, Read The Fine
Manual (RTFM). The documentation is in
live.html and
live.pdf on the disk in the directory
texlive2004/texmf-doc/doc/english/texlive-en/

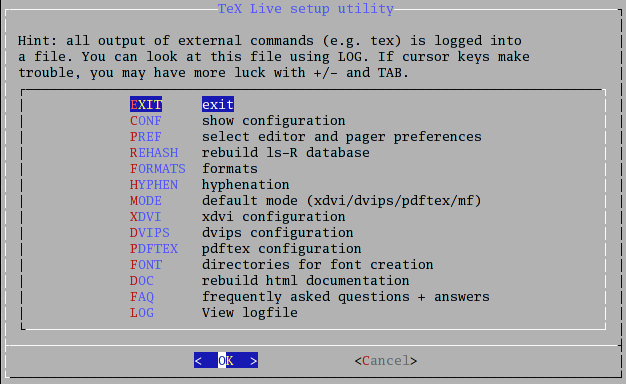
# cd /mnt/cdrom/texlive2004
# sh install-tl.sh
The installer runs in a shell window, so it can be done even from headless systems (those with no X Window client), but it does need to be installed as root if you want to stick with the default directory locations or install it system-wide for multiple users. To install, just type the commands shown above.
The options are mostly self-explanatory, and beginners should pick the recommended scheme and leave all other settings at their defaults. The character-driven interface lets you browse around the settings changing things and looking at options before you commit to installing anything.
==================> TeX Live installation procedure <=================

===> Note: Letters/digits in <angle brackets> indicate menu items <===
===>       for commands or configurable options                   <===

    Proposed platform: Intel x86 with GNU/Linux
    <P> over-ride system detection and choose platform
    <B> binary systems:         1 out of 10
    <S> Installation scheme (scheme_recommended)
    [customizing installation scheme:
       <C> standard collections   <L> language collections]
    20 out of 75, disk space required: 246857 kB
    <D> directories:
      TEXDIR      (The main TeX directory)        : /usr/TeX
      TEXMFLOCAL  (Directory for local styles etc): /usr/TeX/texmf-local
      VARTEXMF    (Directory for local config)    : /usr/TeX/texmf-var
    <O> options:
       [ ] alternate directory for generated fonts ()
       [ ] create symlinks in standard directories
       [ ] do not install macro/font doc tree
       [ ] do not install macro/font source tree
    <R> do not install files, set up to run off CD or DVD
    <I> start installation
    <H> help,  <Q> quit

Enter command:
‘Collections’ (the C and L options) are groups of LATEX packages that you can include or exclude. It's best to leave this alone unless you know you need something specific. The only options I sometimes set are under O: the ‘alternate directory for generated fonts’ may need to be on a different partition for performance reasons on a shared system; and I always select ‘create symlinks in standard directories’ so that the system works immediately after the post-installation configuration (after installation, run texconfig to adjust your local settings.
Note that the Linux/Unix installation does not install any editors: it is assumed you can do this yourself from your distribution's standard package system (most likely you will already be using Emacs or vi anyway).
1.3 Installation for Apple Mac
This is exactly the same interface as for the Linux/Unix installation. You need the bash shell (see the warning in the manual for users of older systems).
There is a choice of graphical editors for the Mac: two are included on the DVD, TEXShop and ITEXMac, but they need to be installed separately, after installing TEX.
1.4 Installation for Microsoft Windows
Before you install TEX, make sure you have enough disk space: the default installation takes about 350Mb on a modern filesystem. The installation assumes you have a fully updated version of Windows, so visit the Microsoft Web site first (http://www.microsoft.com/) and click on Windows Update. Select and install all the relevant updates for your operating system (Windows 95, 98, ME, 2000, NT, or XP). You should be doing this regularly anyway, to keep your system healthy. You may want to run ScanDisk and give your hard disks a full surface check. TEX consists of a very large number of quite small files, so it's important that your disk is in good order.
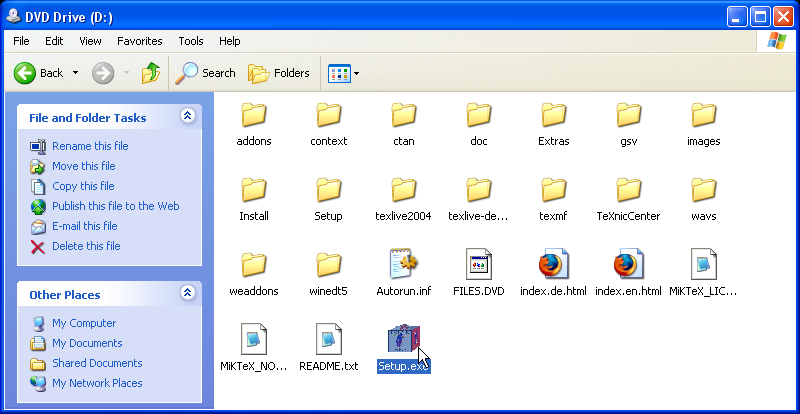
When you insert the distribution DVD or CD, it should start the setup program automatically. If you have auto-run turned off, open My Computer, double-click on the DVD or CD drive, and then double-click Autorun to start the setup program.1
- Some builds of Windows seem to have a bug that stops
Autorun starting the
installation. In that case (for the TEX Collection 2004
DVD) double-click
Setup.exeinstead, or (for the TEX Collection 2003 CD) go to thetpmfolder and double-click onTeXSetup.exe.
1.4.1 proTEXt (TEX Collection 2004)
For proTEXt from the TEX Collection DVD, follow the instructions in the PDF documentation which opens automatically when you start the setup.
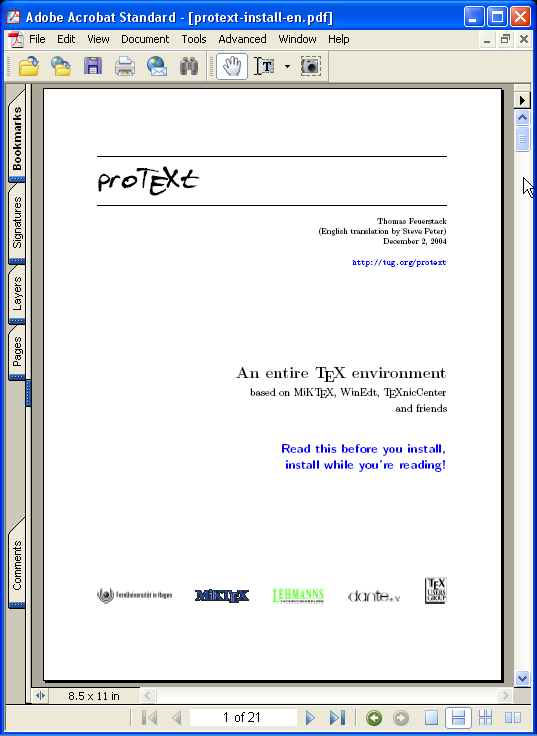
The documentation contains links (in large blue type) that you click on in sequence to run the installation process. (This is actually very good: everything worked first time when I did it on XP.) Basically, you need to install a) MIKTEX; b) either WinEdt (with or without some of its add-ons) or TEXnicCenter; and c) GhostScript and GSview.
- Install MIKTEX
proTEXt uses the MIKTEX distribution as its core, a long-established and popular distribution for Windows.
- Install WinEdt
This is optional: it's a good editor, especially for the heavy user of a MIKTEX-based system. This is a free month's trial — after that it reminds you to cough up and register.
- Install the WinEdt New LATEX Document Interface
Optional again, and only applicable if you installed WinEdt anyway. It lets you save commonly-used document settings for use in other documents of the same type.
- Install the WinEdt
Graphics Interface
Another optional add-on for WinEdt to provide drag-and-drop graphics insertion.
- Install the WinEdt Table
Designer
Last optional add-on for WinEdt, providing a new table editor.
- Install TEXnicCenter
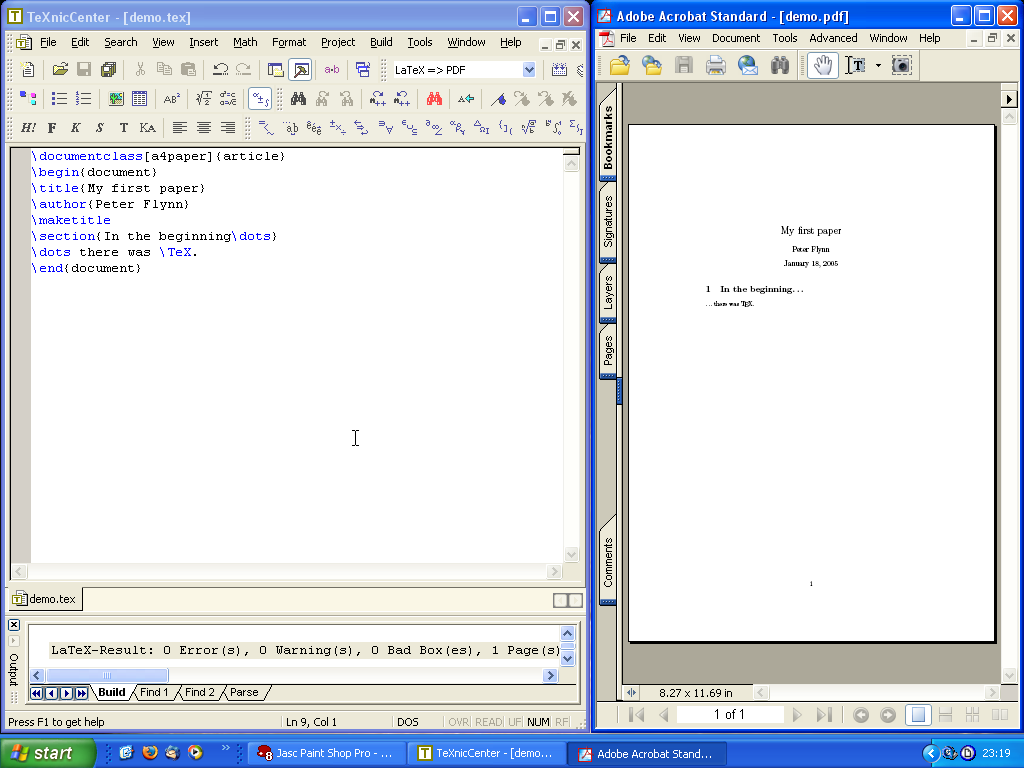
This is a free equivalent to WinEdt. The interface is slightly different (see Figure 1.2) but it is becoming very popular.
- Install GhostScript and
GSview
These are essential for viewing the PostScript and PDF output, especially if you don't have any other PDF viewer installed.
You get a choice of editors, but the one which features in proTEXt is TEXnicCenter. This is an Integrated Development Environment (IDE) which lets you manage all the files related to each document. In many cases, of course, you'll only have one (the text itself) but if you are working with anything beyond simple articles, you'll probably have illustrations (images or diagrams), and possibly separate chapter files for larger documents, plus indexes, glossaries, bibliographies, etc. I recommend that you create a new project for each new document, even if it's a single-file article, as I did for the example in Figure 1.2.
1.4.2 TEX Live (TEX Collection 2003)
- LATEX
Install LATEX itself from the → menu. If you're new to LATEX, pick Quick Install on the following screen. This gives you everything you need to get started, and doesn't ask any questions, it just installs it all straight away.
If you're installing under Windows NT, 2000, or XP, you may want to click on the option to install for all users if you have other users on your system.
If you want to use Emacs as your editor, click the option for XemTEX Support.2
- Emacs
After installation, right-click and drag
Xemacs.exefrom theC:\Program Files\TeXLive\bin\win32folder out onto your desktop and let go, then pick ‘Create Shortcut’. This places Emacs on your desktop for easy access. - WinShell and WinEdt
If you want to install WinShell, run the installer program in the
support/winshelldirectory. For WinEdt you must go to their Web site (http://www.winedt.com/) for a downloadable version.You don't have to install just one editor: if you've got the space, install them all so you can try them out. You can always uninstall the ones you don't want afterwards.
- GSView
Ghostscript is installed automatically, but for GSView you need to go to http://www.cs.wisc.edu/~ghost/gsview/, and download the most recent version.
If you use GSView, please register your copy with Ghostgum, Pty. (http://www.ghostgum.com.au/).
- Note this unfortunate choice of name is nothing to do with Eberhard Matthes' MS-DOS implementation of TEX called emTEX — the ‘Xem’ is short for Xemacs.
1.4.3 Installation problems
It's always annoying when a program that's supposed to install painlessly causes trouble, and none the more so when everyone else seems to have been able to install it without problems. I've installed TEX hundreds of times and very rarely had any difficulties, but these are a few of the occasions when I did.
- Bad hard disks
As recommended in section 1.4, run a scan and defragmentation of your hard disk[s] before you start. It should take under an hour on a modern machine unless you have a very large disk, and it may need overnight on an older machine. Clean your CD or DVD drive if it's been in heavy use. TEX uses a very large number of very small files, so there is a lot of disk activity during an installation. As also recommended in section 1.2, if you have the chance to reformat the hard disk, pick the smallest granularity (cluster size) possible.
- Registry errors
This only affects Microsoft Windows users. The Registry is where Microsoft want software companies automatically to store details of all the programs you install. Unfortunately the Registry is grossly abused by marketing departments to try and foist undesirable links on you, the user. You will see this with many commercial programs, where a particular type of file you've been able to double-click on for years suddenly runs a different program. Some programs install obsolete or broken copies of program libraries (DLL files), overwriting ones which were working perfectly. Worse, the viruses, trojans, and worms which typically infect unprotected Windows systems can leave unwanted links to web pages, or change some of the ways in which Windows operates. The overall effect can be that the whole machine slows down, or that files which are expected to do one thing do another. The best solution is a thorough Registry clean-out, using one of the many programs available for the purpose.
- Use the latest versions
Before installing, check the CTAN web site (http://www.ctan.org/ for any updated copy of the installation program. This is called
install-tl.shfor Linux and Mac systems, andSetup.exefor Microsoft Windows (on the TEX Collection 2003 CD it was calledTeXSetup.exe). Just occasionally a bug slips through onto the production CD or DVD, and although it's always fixed and notified on comp.text.tex, that's a high-volume newsgroup and even the sharpest eyes may miss an announcement.- Stick to the defaults
Unless you're a computer scientist or a software engineer, I suggest you never change or fiddle with the default directories for installation. I know some of them look odd, but they're that way for a purpose, especially when it comes to avoiding directories will spaces in their names, like the notorious
C:\Program Files. Although most modern systems cope happily with spaces in filenames and directory names, they are usually A Bad Design Idea, and should be avoided like the plague (spaces are forbidden in web addresses for the same reason: the people who designed them knew the pitfalls). It may look snazzier to put the installation inMy Cute Stuff, but please don't: you'll just make it harder to find, harder to fix problems, and more embarrassing if you have to explain it to someone else trying to help you.


